
Doing the practical’s in SSAS(SQL Server Analysis Services) is easy but the steps involved in that is lengthy as there are many clicks which are involved in the whole process. Unless it is practiced on your own achieving Excellency is difficult.
Here demonstrating steps written by attendee of MSBI training in Mumbai who himself has done the practical and written a write-up out of it.
Step 1: Select a table and modify the table with some columns. Here we are modifying the Sales person table and adding the Sales Person Boss Name column in it which will be better to understand hierarchical dimensions data.
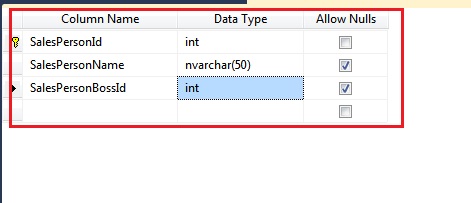
Step 2: Now make the Sales Person Boss Id as self-referencing primary key.
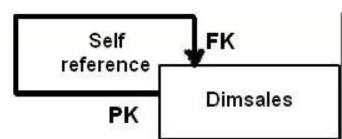
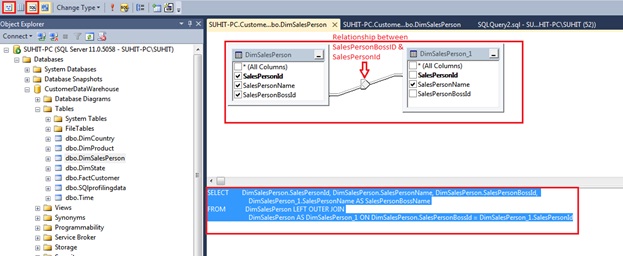
To do that we have to go to the diagram pane option and give the self-referencing primary key and generate an SQL query.
Step 3: After doing this we have to now make changes in our SSAS project. Now as we have changed our database table due to that our old Dimension tables will not work and we have to create new Dimension tables.
If some changes happen in dimension or cube, we have to make changes in that particular dimension or the cube. Deleting the whole cube & dimension and recreating is a very bad idea and not advised in production.
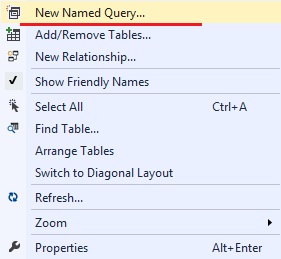
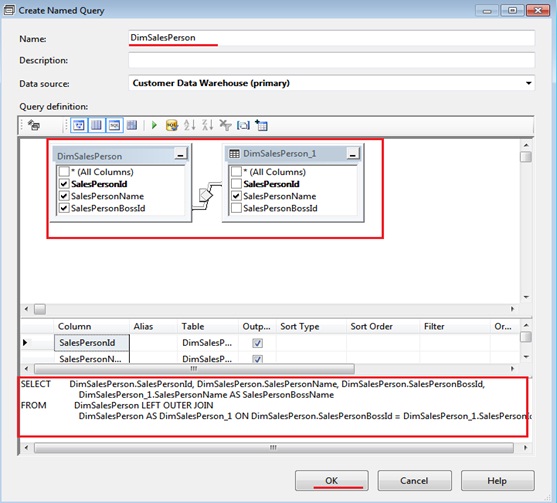
So first we will delete the Sales person table in our data source view diagram and then we will generate a query based table.

Now copy the query which we have generated in our SQL server and paste it here and create the query based table.
Step 4: After creating the query based table set the logical primary key to the Sales person id and define the relationship.
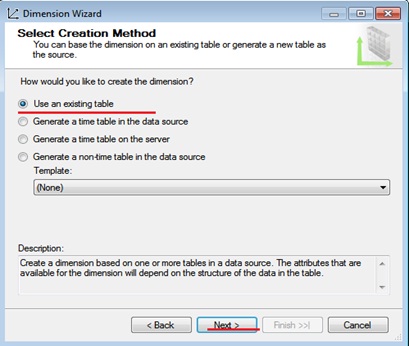
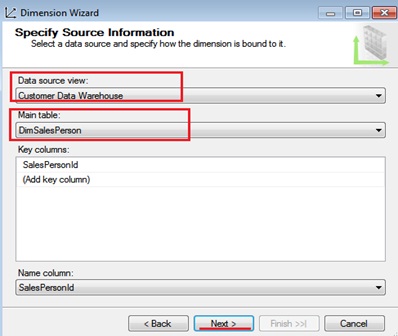
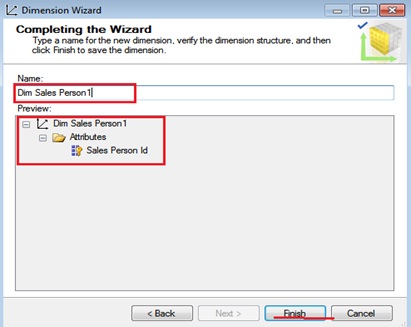
Step 5: After this is done now delete only the Sales Person Dimension and create a new dimension. The wizard will open and we have to select the database and the correct table and then create the dimension.

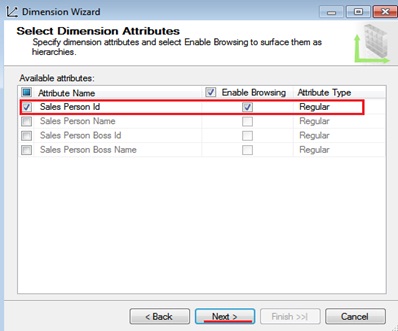
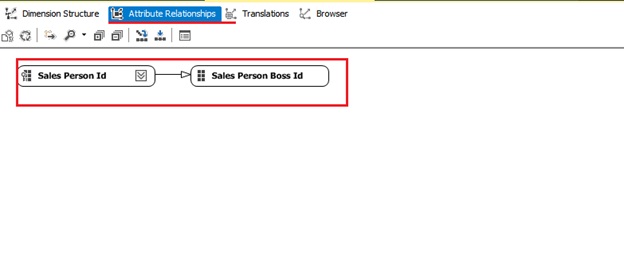
Step 6: As soon as we have created this, we will then modify the dimension by dragging and dropping the remaining fields and creating a hierarchy.
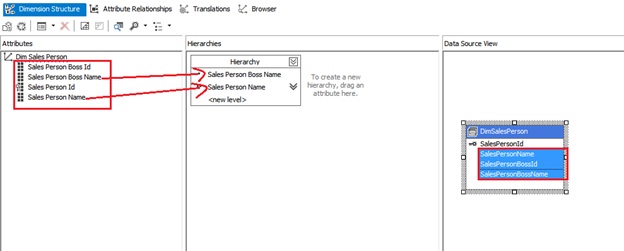
The hierarchy will look like this,
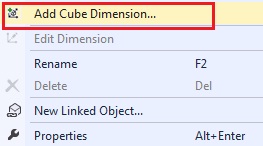
Step 7: After creating the hierarchy, we have to then add the dimension in our cube and then process the cube. To add the dimensions right click on the dimensions space in the Cube.
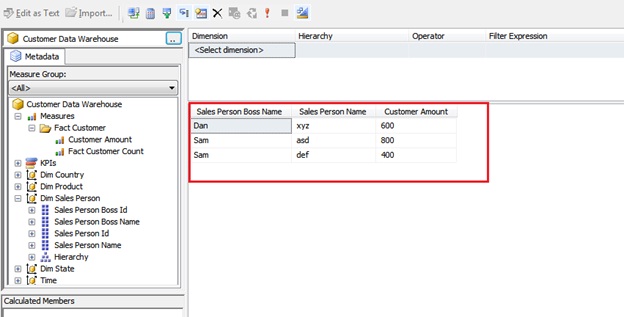
Now after adding, process the cube and then go to the browser and see the hierarchical data.
Please Note: The very important thing to remember is that never to delete and recreate the Cube and Dimensions as it is very dangerous in production. Instead modify or recreate the individual dimension or cube that is advised.
MSBI is more of dealing with designer rather than doing coding in code behind unlike it is done under Visual Studio. Attending MSBI training in classroom will enhance learning of the topic and make life easy.